How to Make MS Azure Compatible with Chef

Audio : Listen to This Blog.
Let’s get an overview of Microsoft Azure cloud and, how the popular configuration management tool Chef can be installed on Azure for making them work together.
Chef Introduction
Chef is a configuration management tool that turns infrastructure into code. You can easily configure your server with the help of Chef. Chef will help you automate, build, deploy, and manage the infrastructure process.
If you want to know more about Chef, please refer to https://docs.chef.io/index.html.
In order to know how you can create a user account on hosted Chef, please refer to:https://manage.chef.io/signup; alternatively, use open-source Chef by referring to:https://docs.chef.io/install_server.html.
Microsoft Azure
Microsoft Azure is a cloud computing platform and infrastructure created by Microsoft for building, deploying, and managing applications and services through a global network of Microsoft-managed datacenters.
It provides both PaaS and IaaS services and supports many different programming languages, tools, and frameworks, including both Microsoft-specific and third-party software and systems.
For more details refer to: http://azure.microsoft.com/en-in/ andhttp://msdn.microsoft.com/en-us/library/azure/dd163896.aspx.
There are three ways to install Chef extension on Azure cloud:
- By using Azure Portal
2. Azure PowerShell CLI
3. Knife-azure – The Chef’s CLI tool for Azure provider
Prerequisites
-
-
- Active account on the Azure cloud; https://manage.windowsazure.com or https://portal.azure.com
- Active account on hosted Chef; See https://manage.chef.io/signup.
-
We need your Chef’s account organization_validation key, rb and run_list.
log_location: STDOUT
chef_server_url  "https://api.opscode.com/organizations/"
validation_client_name 	"-validator"
+36+9
1.1 List existing virtual machines:

1.2 Select existing VM:

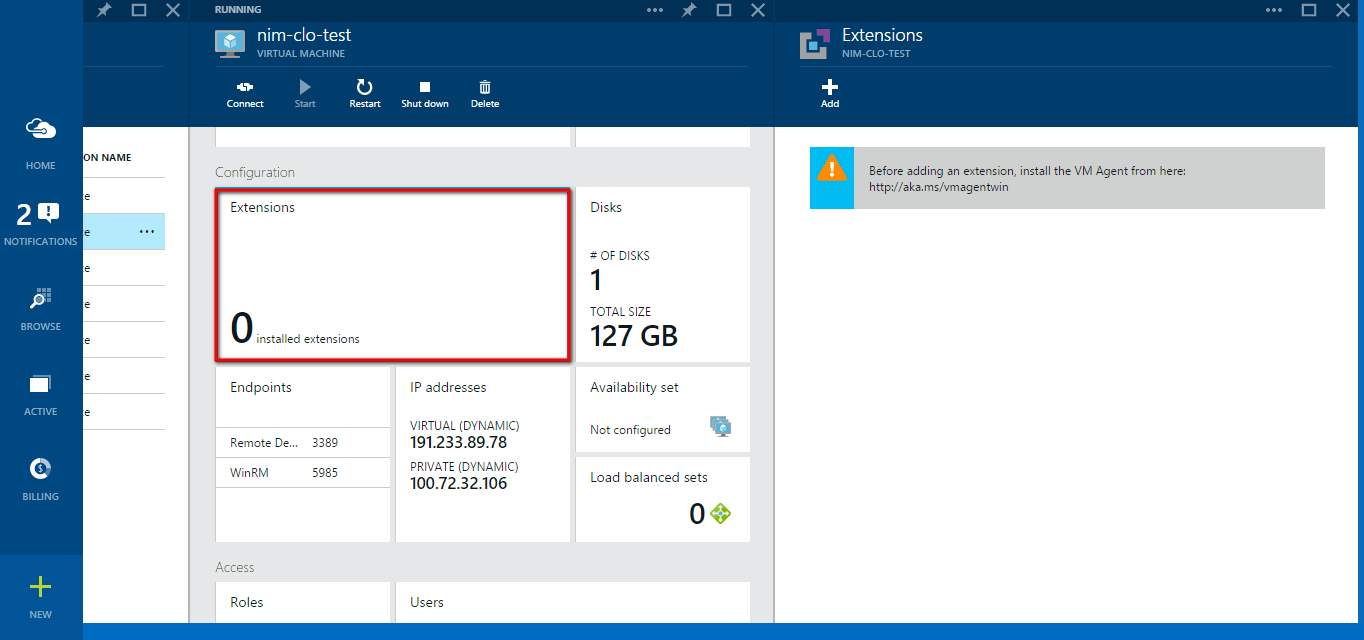
1.3 Click the Extensions section:

1.4 Select Add Extension:

1.5 Select the Chef extension:

1.6 Click the Create button:

1.7 Upload Chef configuration files:

1.8 You can now see the Chef extension for VM:

2. Azure PowerShell CLI Tool
Refer- http://msdn.microsoft.com/en-us/library/azure/jj156055.aspx
Prerequisites
Install Azure PowerShell Tool; refer to http://azure.microsoft.com/en-in/documentation/articles/install-configure-powershell/
Azure user accounts publish settings file.
We are going to use Azure PowerShell cmdlets to install the Chef extension on Azure VM.
2.1 Import your Azure user account into your PowerShell Session. Download subscription credentials for accessing Azure. This can be done by executing a cmdlet.
PS C:\> Get-AzurePublishSettingsFile
It will launch your browser and download the credentials file.
PS C:\> Import-AzurePublishSettingsFile
PS C:\> Select-AzureSubscription -SubscriptionName ""
PS C:\> Set-AzureSubscription -SubscriptionName "" -CurrentStorageAccountName ""
# Set VM and Cloud Service names
PS C:\> $vm1 = "azurechef"
PS C:\> $svc = "azurechef"
PS C:\> $username = 'azure'
PS C:\> $password = 'azure@123'
PS C:\> $img =
#Note- Try Get-AzureVMImage cmdlet to list images
PS C:\> $vmObj1 = New-AzureVMConfig -Name $vm1 -InstanceSize Small -ImageName $img
#Add-AzureProvisioningConfig  for Windows OR Linux VM
# For Windows VM
     PS C:\> $vmObj1 = Add-AzureProvisioningConfig -VM $vmObj1 -Password $password -AdminUsername
$username –Windows
# For Linux VM
     PS C:\> $vmObj1 = Add-AzureProvisioningConfig -VM $vmObj1 -Password $password -LinuxUser
$username -Linux
# Set AzureVMChefExtension for Windows OR Linux VM
# For Windows VM
     PS C:\> $vmObj1 = Set-AzureVMChefExtension -VM $vmObj1 -ValidationPem "C:\\users\\azure\
\msazurechef-validator.pem" -ClientRb "C:\\users\\azure\\client.rb" -RunList "getting-started"
-Windows
# For Linux VM
      PS C:\> $vmObj1 = Set-AzureVMChefExtension -VM $vmObj1 -ValidationPem "C:\\users\\azure\
\msazurechef-validator.pem" -ClientRb "C:\\users\\azure\\client.rb" -RunList "getting-started" -Linux
 # Create VM
     PS C:\> New-AzureVM -Location 'West US' -ServiceName $svc -VM $vObj1
# Get existing azure VM
     PS C:\> $vmObj1 = Get-AzureVM -ServiceName  -Name
# Set AzureVMChefExtension for Windows OR Linux VM
# For Windows VM
     PS C:\> $vmObj1 = Set-AzureVMChefExtension -VM $vmObj1 -ValidationPem "C:\\users\\azure\
\msazurechef-validator.pem" -ClientRb "C:\\users\\azure\\client.rb" -RunList "getting-started" -Windows
# For Linux VM
     PS C:\> $vmObj1 = Set-AzureVMChefExtension -VM $vmObj1 -ValidationPem "C:\\users\\azure\
\msazurechef-validator.pem" -ClientRb "C:\\users\\azure\\client.rb" -RunList "getting-started" -Linux
# Get existing azure VM
PS C:\> $vmObj1 = Get-AzureVM -ServiceName  -Name
# Remove Chef Extension from VM
PS C:\> Remove-AzureVMChefExtension -VM $vmObj1
# Update VM
PS C:\> Update-AzureVM -ServiceName $vmName -Name $vmName -VM $vmObj1
# Get existing azure VM
PS C:\> $vmObj1 = Get-AzureVM -ServiceName  -Name
# Get Chef Extension details from VM
PS C:\> Set-AzureVMChefExtension -VM $vmObj1
For more details refer to https://docs.chef.io/plugin_knife_azure.html orhttps://github.com/opscode/knife-azure
Prerequisites:
- ruby v1.9.3 +
- chef v11.0 +
- knife-azure v1.4.0.rc.0 plugin
- Azure user account publishsettings file
- Chef user accounts configuration files
Install Ruby:
On Windows- http://rubyinstaller.org/
On Linux- https://rvm.io/
Install Chef:
$ gem install chef
$ gem install knife-azure --pre
This starter kit includes Chef’s user/organization related configuration details. i.e., user.pem,organization-validator.pem and knife.rb files.
Please refer to: https://learn.chef.io/legacy/get-started/#installthestarterkit orhttps://manage.chef.io/starter-kit.
Run knife azure command to create VM and install chef extension-
Create Windows VM command:
$ knife azure server create  --azure-source-image   --azure-dns-name   --azure-service-location "
" --winrm-user  --winrm-password   --azure-publish-settings-file  -c  --bootstrap-protocol "cloud-api"
$ knife azure server create -I  -x  -P  --bootstrap-protocol "cloud-api" -c  --azure-service-location"
" --azure-publish-settings-file
$ knife azure image list -c --azure-publish-settings-file
